Fiber & Optic Cleaning Guide

Why, How, and When to Clean your Fiber Cables and Transceivers

Small dust = big problems.

Contamination is the leading cause of optical failure in a network.

Optical Transceivers & Cabling require clean endfaces to fully transfer light. Obstructions can lead to multiple points of failure & possibly be damaged permanently.

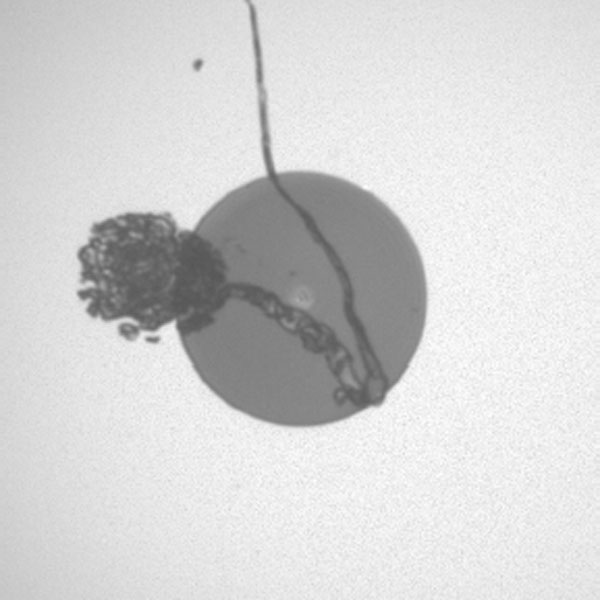
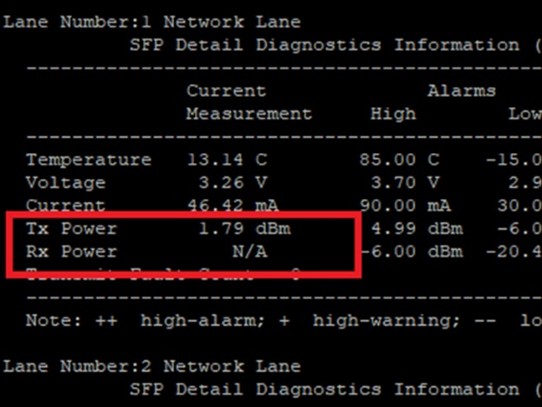
Contaminated Connector
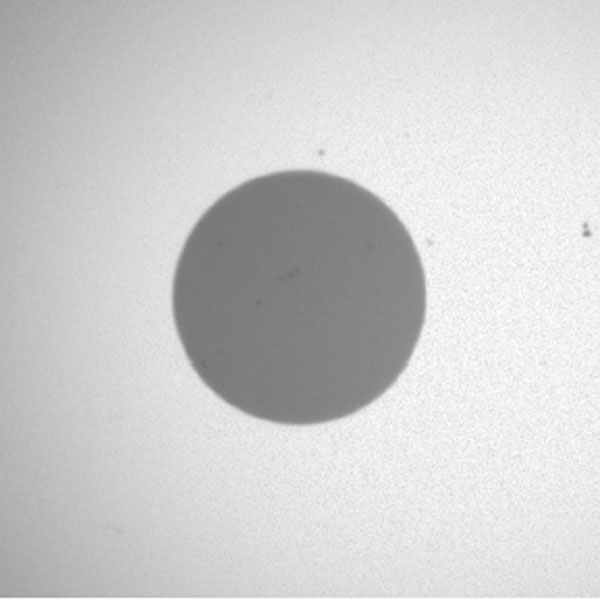
Contaminated fiber-optic connector endface showing a large particulate debris cluster and a smeared contamination trail across the core region, with additional residue extending into the cladding. This level of contamination can cause excessive insertion loss, back reflection, and potential endface damage if mated without proper cleaning.

Clean Connector

Clean fiber-optic connector endface with a uniform core region and no visible particulate debris, scratches, or residue. The endface appears properly cleaned and suitable for mating, minimizing insertion loss and back reflection.


To prevent cross-contamination, signal degradation, and network failure, you must clean both the Fiber Cable and the Transceiver before every installation; even microscopic debris on one surface can permanently scratch the other, compromising the entire link.

Common Errors Found by Contamination

  • Low/Unstable Rx power

    Contamination likely → ICI (Inspect/Clean/Inspect Again) both cable and transceiver. Reseat.

  • CRCs / Input Errors

    Re-clean; If recurring, replace the patch cord.

  • Link Flapping

    ICI (Inspect/Clean/Inspect Again) both cable and transceiver, reseat, verify latches fully engaged, check bend radius.

How To Clean a Transceiver

Gather Cleaning Supplies:
• Pen Fiber Cleaner

Cleaning Method (Recommended)
Inspect the cable connector and transceiver port for visible dust or debris if inspection tools are available.

Use a Pen Fiber Cleaner inside the transceiver port.
• Insert the cleaner tip straight into the receptacle.
• Press to activate the cleaning pen.
• Repeat as needed (typically 2–3 clicks).


How To Clean a Fiber Cable

Gather Cleaning Supplies:
• Fiber Cleaning Cassette
• Pen Fiber Cleaner
Cleaning Method (Recommended)
Inspect the cable connector and transceiver port for visible dust or debris if inspection tools are available.

Use a Fiber Cleaning Cassette on the connector endface:
• Press the lever or shutter on the cassette to advance a fresh section of the cleaning ribbon.
• Hold the connector perpendicularly to the exposed cleaning surface.
• Gently press the connector endface against the tape and slide it in a straight line in the direction of the arrow indicated on the tool.
• Repeat as needed ensuring the cassette lever is reset to use a fresh section of the cleaning ribbon per application.

Alternative Method – Use a Pen Fiber Cleaner on the connector endface:
• Align the cleaner tip with the connector tip.
• Press to activate the cleaning pen.
• Repeat as needed (typically 2–3 clicks).
Inspect After Cleaning
After cleaning, it is good practice to inspect the connector endface using a fiber inspection microscope. This ensures that the cleaning process was successful and that there's no residue or other contaminants left behind.
Safety Precautions
• When working with optical modules, make sure you’re in an area equipped for proper ESD (electro-static discharge) protection and follow all required safety procedures.
• Before handling any module, confirm that the device is powered down and handle all optics carefully to avoid damage.
• Only use approved fiber-optic cleaning tools, such as Pen Fiber Cleaners and Cleaning Cassettes.
• Do not use alcohol-based cleaning tools.
• Avoid touching the fiber endface at all times.
Protective Caps
After cleaning, if the transceiver will not be used immediately, ensure you place a protective cap over the connector to prevent future contamination.
Regular Cleaning and Inspection
Cleaning your cables can significantly extend their lifespan and ensure consistent and reliable performance. Proper care and handling are essential, given the sensitive nature of optical connections.

The 30-Second Method: ICI (Inspect/Clean/Inspect Again)

  • Inspect

    BOTH endfaces with a scope.

  • Clean

    BOTH the fiber connector + port (or transceiver) (1–3 clicks with the right tool).

  • Inspect Again

    Connect only when clean.

Minimal Kit (what you actually need)

cassette_cleaner
GT-FIB-CASFC
Fiber Connector Cassette Fiber Cleaner- APC/UPC LC, SC, ST, FC, MT, MU, E2000 (500+ Cleans)

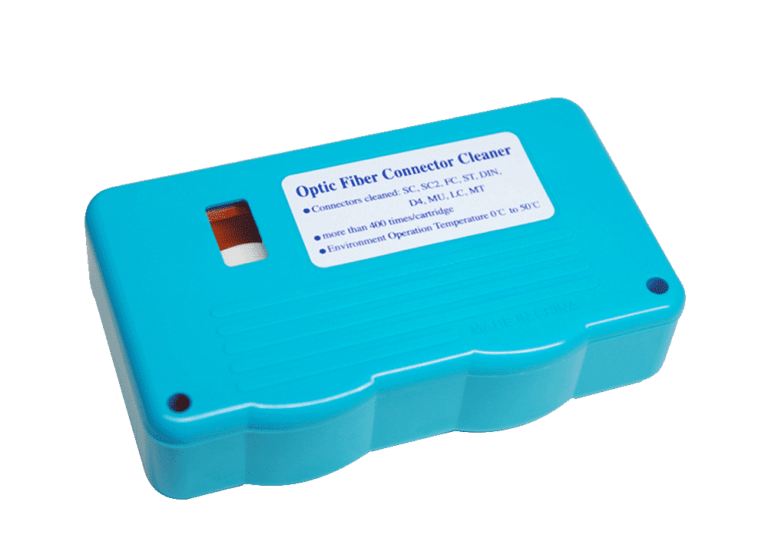
Reel-type cleaners quickly and effectively clean a variety of connectors. Reel-type cleaners are a safe cleaning option without the need for alcohol, which can be toxic and flammable. They have refillable cleaning tapes making them ideal for lab, assembly lines and field use.

Pushpen1
GT-LCS-PENFC
LC/MU Simplex Click Pen Fiber Cleaner (800+ Cleans)

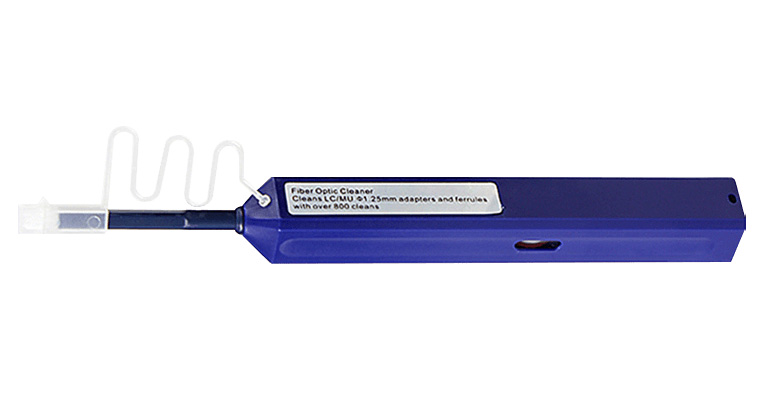
Designed for cleaning LC and MU type connectors, this fiber cleaner can easily remove dirt, dust, oil and grease from an optical fiber adaptor. With the ability to each into the entire area within the connector, it makes cleaning of the ferrule endface a simple task with the push of a button.

pushpen2
GT-MPO-PENFC
MTP/MPO Click Pen Fiber Cleaner (500+ Cleans)

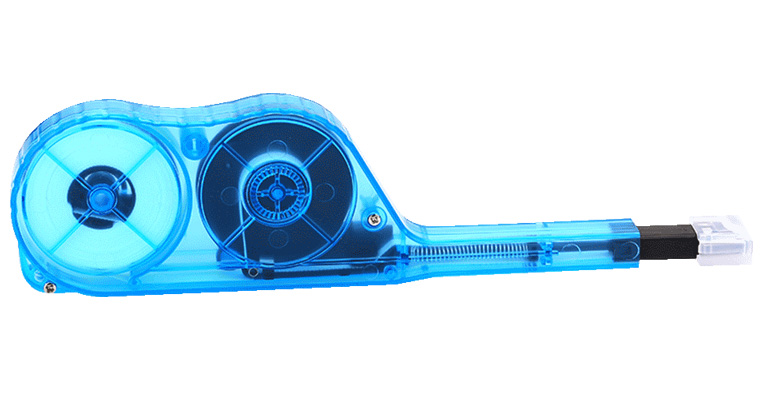
This push-type cleaner is specifically designed for the cleaning of ferrule endfaces in MTP/MPO adapters. With the ability to clean all 8/12/24 fibers simultaneously it is a time and cost efficient tool for the maintenance of fiber cables. Can clean both exposed jumper ends as well as connectors embedded in the adapter.

Does & Don'ts

Do

Don't

When to Clean – ICI (Inspect → Clean → Inspect)

  • At Install

    ICI every mating pair + ports

  • After any service touch

    ICI before reconnect

  • If errors / loss appear

    ICI both ends first, then escalate